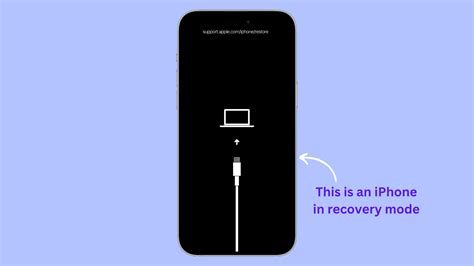
How to Put Your iPhone or iPad into Recovery Mode: A Simple Guide

If you're an iPhone or iPad user, you might have come across situations where your device is acting up or encountering software-related problems. One effective way to address such issues is by putting your device into recovery mode. In this guide, we'll walk you through the simple process of how to put your iPhone or iPad into recovery mode, helping you troubleshoot problems and potentially restore your device to its normal functioning.
What is Recovery Mode?
Recovery mode is a state in which your iPhone or iPad can be accessed by your computer, allowing you to perform various maintenance tasks, such as restoring your device's operating system or updating it. This mode is particularly useful when your device is experiencing issues like a frozen screen, software crashes, or failed updates. Putting your device into recovery mode temporarily bypasses the normal boot process and allows you to address these problems.Step-by-Step Guide: How to Put Your iPhone or iPad into Recovery Mode
Follow these simple steps to put your device into recovery mode: Step 1: Prepare Your Equipment Before you start, ensure that you have the following:- A Mac or Windows PC with the latest version of iTunes installed.
- A Lightning to USB cable (the cable you use for charging your device).
- Connect your iPhone or iPad to your computer using the Lightning to USB cable.
- If prompted, enter your device passcode or choose to "Trust This Computer."
- Quickly press and release the Volume Up button.
- Quickly press and release the Volume Down button.
- Press and hold the Side button until you see the recovery mode screen.
- Press and hold the Volume Down button and the Sleep/Wake (Side) button simultaneously.
- Keep holding both buttons until you see the recovery mode screen.
- Press and hold the Home button and the Sleep/Wake (Top) button simultaneously.
- Keep holding both buttons until you see the recovery mode screen.
- Quickly press and release the Volume Up button.
- Quickly press and release the Volume Down button.
- Press and hold the Top button until you see the recovery mode screen.
- Restore: This option erases all data on your device and reinstalls the latest iOS/iPadOS version. Use this if you're facing persistent software issues.
- Update: This option updates your device's operating system without erasing data. It's useful when you want to keep your data intact but update the software.